Saturday, 30 March 2013

Upside Down Frosting Technique


I first saw this technique demonstrated by Jessie Cakes a while back and have wanted to try it for a while.  A recent post on one of my Facebook haunts brought it back to the forefront of my mind and I decided to give it a go for our family Easter Cake this year.  I'm a complete novice but I was very happy with the results I achieved and am confident they will only get better with practise.  So here is a realistic pic of what the average joe can expect to achieve using this fabulous techinique and frosting your cake UPSIDE DOWN :)

For starters to do this you'll need a spackling knife, a piece of card, some grease proof paper and a decorators turntable.  

Trace around the top of your pan onto the card and tape down a piece of grase proof paper making sure there are no creases.

 Add your Buttercream and spread until it is about 1/4in past the circle you traced.
Place in the fridge for about 15 minutes.

Once chilled, remove from fridge and position the top cake layer upside down on the buttercream circle.
Fill stack and crumb coat your cake and return to the fridge for 15 miuntes.


Remove from fridge and add the final coat of buttercream to the side of your cake.  Be generous as you will remove the excess in the next step.


Forgive my photo,  the spackling knife should be held at a 45degree angle not straight on.  It was just hard for me to hold it correctly and snap the picture.  I should say it also took a few spins for me to get the hang of the correct angle to hold it.

Using your clean spackling knife held at approx 45 degree angle place your hand all the way around the cake back to where the knife is touching the cake and spin the turntable all the way around without stopping.  Make sure the spackling knife is touching the board as you do this.   If you need to go over it again make sure the spackling knife is clean each time you go around.

When you are happy with it turn the cake over onto its board.  Remove the cardboard from the top but do not remove the greaseproof paper.  Return the cake to the fridge for 15 minutes.


Remove from the fridge and carefully peel away the grease proof paper and Voila!


You should have a flat top and nice crisp edges.  Now as I said, I'm a novice.  This demonstation is the first time I have EVER tried this technique.  So no, mine doesn't look as perfect as Jessie Cakes but I think it does show that you can get very clean lines with this technique and with a little practice mine could look as good as hers.  So there you have it.  The upside down frosting technique is the way forward in my books.


 So what to do with my lovely cake.  It is Easter after all so I decided to make a treat for the Family to enjoy Easter Sunday.  And since I'm sharing techniques in this post I thought I would add another very useful tip.  This one is for piping with buttercream.  I have reusable bags but would often use the diposable ones because I hate the clean up.  Then I discovered this handy tip.


First place the buttercream in some cling film.


Then roll up the ends of the cling film.


 Insert the coupler and then insert the icing into your piping bag.


Pull the end of the cling film out.


And cut it off.  


 Twist your bag closed and it is ready to use.


When your done simply remove the insert and throw it away and the inside of your bag will still be clean.


Tuesday, 19 March 2013

Chocolate Wedding Cake


My Sister in Law was kind enough to ask me to make her Wedding Cake for this weekend.  I have created a 2 tier Chocolate Mudd Cake with Ivory Roses and Purple Hydrangea.

I used Wiltons recipe for Chocolate Fondant and was pleased with the results.  Allbeit I did find it much harder to roll out, but the end result looked and tasted lovely.

I used my new Blossom Art Hydrangea cutter to make the lovely little hydrangeas and add purple accents around my Ivory gumpaste roses.

 I also experimented with Gelatin Butterflies for the first time.  I used the PME Butterfly Cutters and "painted" a thin layer of gelatin directly onto the cutter.  After a couple of hours I peeled the gelatin off and placed in a folded piece of cardboard to dry completely in the folded butterfly shape.  It was surprisingly easy to work with.  I thought the gelatin would be very delicate and break easily but it was very much the opposite.  It peels very easily from the cutter without breaking and dries very stable and hard. 

My Chocolate Mudd Cake recipe is the bomb if I do say so myself.  It has a dense rich texture and is almost like a Chocolate Brownie.  Perfect for any chocolate lover and the perfect consistency for a wedding cake.  


Chocolate Mudd Cake

Ingredients:
250g unsalted butter
250g chopped dark chocolate
1 packet instant cappuccino
175ml hot water
150g plain flour
60g cocoa powder
1/2 teaspoon biocarbonate of soda
1/4 teaspoon salt
450g caster sugar
4 eggs
2 tablespoons vegetable oil
125ml sourcream

Method:


Heat oven to 170C / 350F / Gas Mark 4

Place butter, chopped dark chocolate, instant cappuccino and hot water in a sauce pan and stir on medium heat until smooth.

Mix plain flour, cocoa powder, biocarbonate of soda, salt and sugar in a large mixing bowl and sieve together.


Mix eggs, oil and sourcream together in a seperate bowl. 

Make a well in the centre of your flour mixture and pour in chocolate mixture and egg mixture.  Stir together until well blended. 

Pour into prepared tin and until cake tester comes out clean when inserted into the centre, approximately 1 hour. 

Recipe makes 1 9inch Round. 


Tuesday, 12 February 2013

Pancake Day PanCake Pops


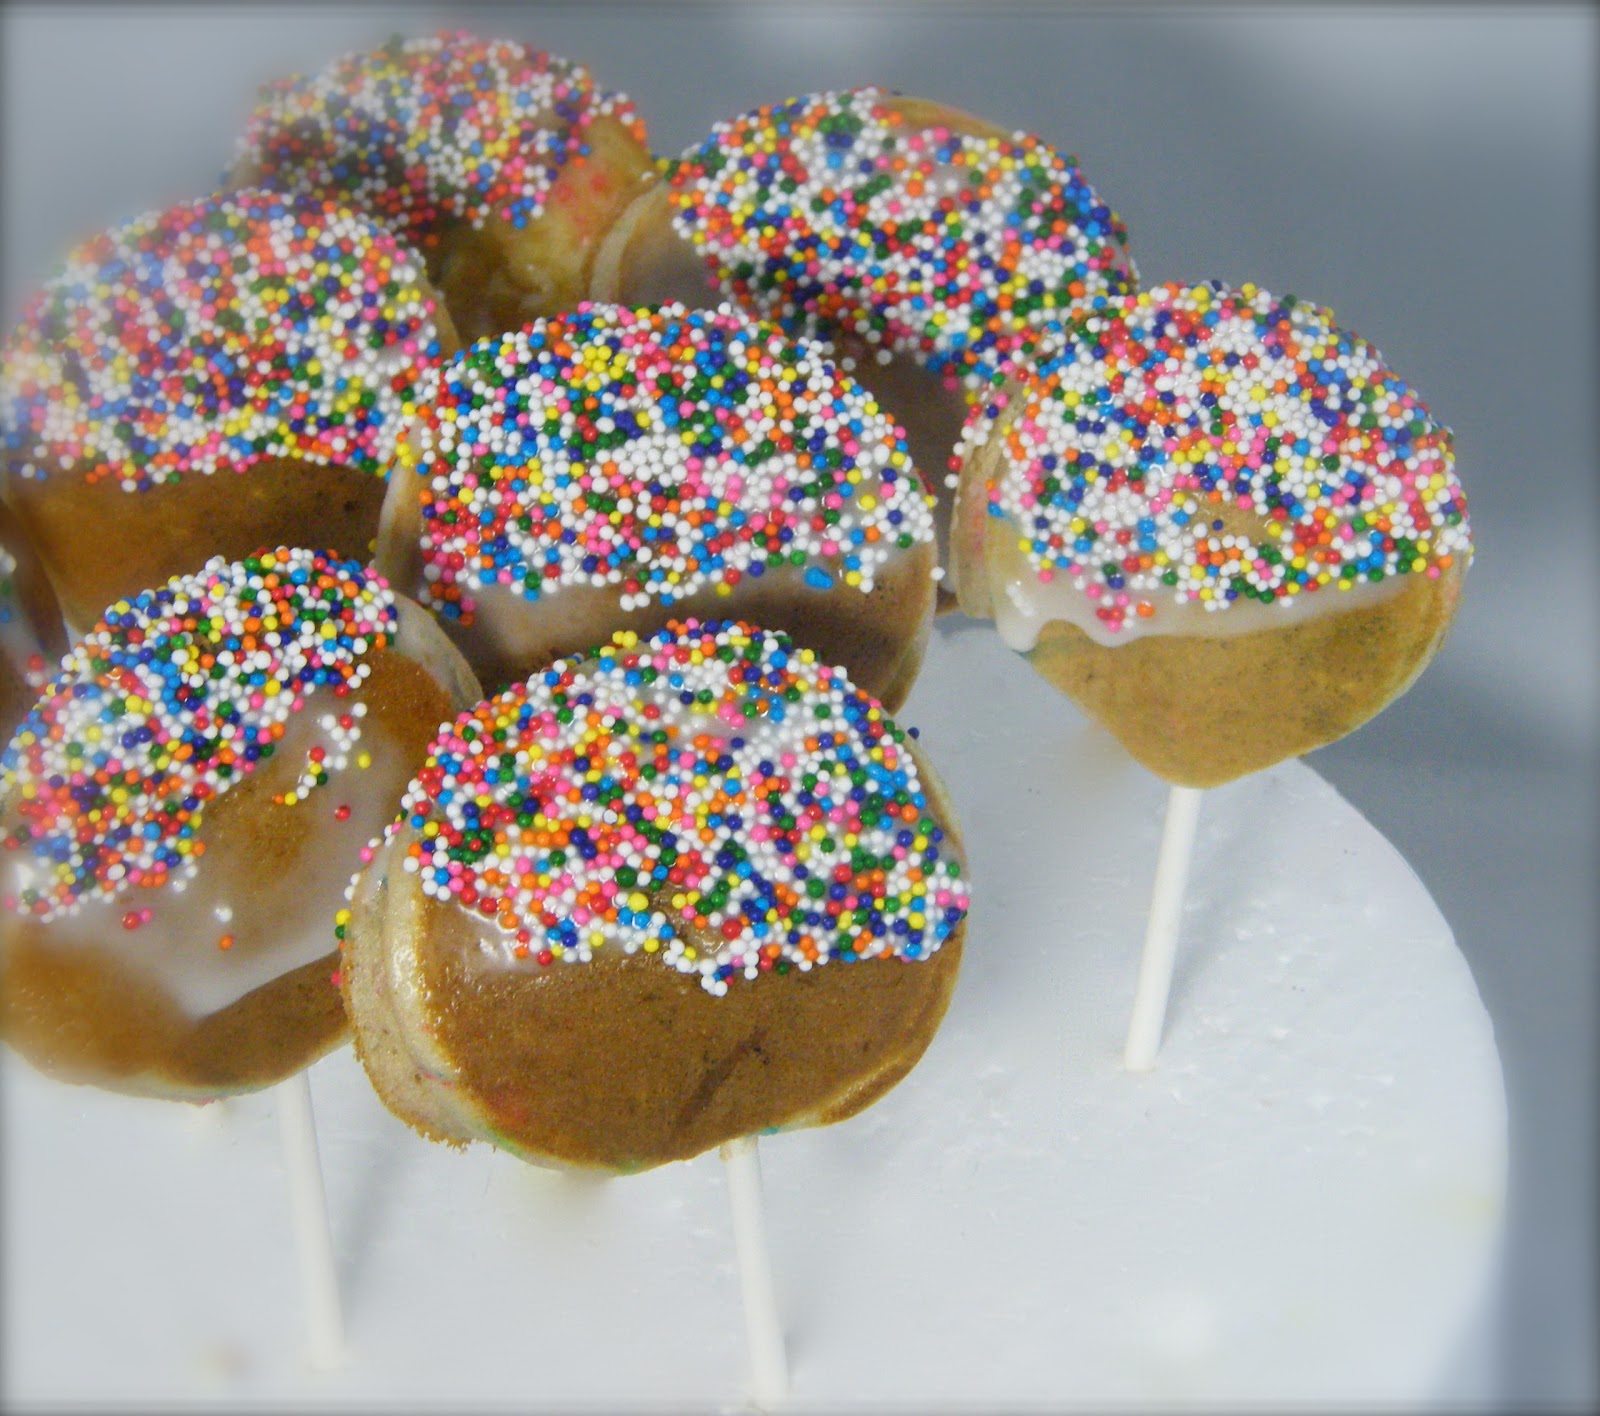
If you're looking for something a little different and fun this Pancake Day, why not try some PanCake Pops?  Little ones love food on a stick and these are so simple to make.  

I mixed some nonpareils with my pancake batter (I love this recipe from Jamie Oliver) and spooned about a tablespoon of batter per pancake.  Just insert a lollipop stick while the batter is cooking and gently flip to cook the other side.  

For the topping I went with a simple mixture of icing sugar and apple juice to form a thick consistency icing.  Make sure to scrape off the mixture a bit after dipping your pancake or it will end up running and dripping, you just want a little bit to coat it.  Then dip in nonpariels and serve.  

Or you could try serving plain with a little bowl of maple syrup for dipping?  

Either way these are fun and delicious.    

Saturday, 2 February 2013

A Sugar Flower Birthday Cake


Just thought I would share my most recent creation.  A Birthday Cake for a Friends Family. This is an 8 in Round Cake.  The spray was made up of 1 Stargazer Lily, 1 Full Rose, 2 Rose Buds, 3 Stems of Lily of the Valley, 3 Stems of Rose Leaves and 5 Stems of Ivy.  All flowers I have in my tutorials pages.

Friday, 25 January 2013

Strawberry Cupcakes with Mascarpone Buttercream Icing


I came across a competition to create a new cupcake flavour for the Hummingbird Bakery.  After a bit of research into their range I decided to create a Strawberry Cupcake.  I know it might not be the most exotic or exciting cupcake, but sometimes the nice simple flavours are the best.  It took 3 attempts to achieve a recipe I was pleased with.  I hope you will enjoy it and fingers crossed on the competition :)


Strawberry Cupcakes with Mascarpone Buttercream Icing


Ingredients:
4 large eggs
1 teaspoon vanilla extract
200g butter
200g caster sugar
250g frozen strawberries
200g good quality self raising flour
90g strawberry gelatin powder (like Hartley's gelatin sachets but I actually
used Osem Strawberry Flavour Quick Jel Dessert Mix)

Icing:
125g mascarpone
125g butter
500g icing sugar
1 teaspoon vanilla
chopped fresh strawberries and pecans for garnish


Method:

Preheat oven to 180C /Gas Mark 4/ 160C Fan Oven

Combine butter and sugar in the bowl of an electric mixer and mix on high speed until very light and fluffy, at least 5 minutes.  

Break eggs into a small bowl.  Add vanilla extract and whisk together.  Add the egg mixture to the butter and sugar mixture a very little bit at a time blending well after each addition.

Combine flour and gelatin into a bowl and blend together.  

Pour frozen strawberries into a food processor or blender and puree strawberries.  

By hand gently fold in the flour gelatin mixture and pureed strawberries into the butter egg mixture.  Fold in just until combined, don't overwork the mixture.  

Spoon into muffin size cupcake cases.  

Bake until lightly browned and a toothpick or cake tester inserted in the centre comes out clean. Mine took 25 minutes.   

Top with Mascarpone Buttercream Icing and garnish with fresh chopped strawberries and pecans.  

Makes 12 

Enjoy!


Wednesday, 16 January 2013

Baking a Message or Picture inside a Cake


To bake a cake with an image inside first you will need to bake a slab of cake to cut out the images.  Make it pretty thin.  I've used a large baking sheet for mine.


You will also need a silicone pan 3 inches deep and some kabob skewers cut to fit tightly inside the pan.


For my cake I decided to try baking a word inside so I've used letter cookie cutters.  A note about the letter cookie cutters, all the ones I could find where slightly too thin for the Kabob skewers (more on this in a minute) so I used them as a template and cut the letters out freehand to make them slightly thicker.  You need to cut enough to fill the entire skewer, mine took 12 cutouts per letter.


 Place skewers through the cutouts.


 Spread the cake batter into the pan then place the kabob skewers carefully in place on top of the batter.


Here I forgot to take a picture but you will want to cover the cutouts with the remaining batter.  Make sure they are completely covered, then bake until done.  It may take longer than usual for your cake to bake.  Mine took nearly 1 1/2 hours before it was done.

Don't forget to remove the skewers :)


When finished you will have a cake with an image inside when cut.


Monday, 14 January 2013

Red Velvet Cake Mix Cinnamon Swirls


Betty Crocker recently started selling Red Velvet Cake mix in the UK.  I was excited to see it on the shelf.  It's been years since I made one.  I was looking into the idea of creating a Red Velvet and Cheesecake cake when I came across this post by No 2 pencil.  I just loved the idea so decided to try it out instead.  Mine did not come out quite as bright red as hers.  I was using Betty Crocker Mix instead of Duncan Hines so maybe this is the reason.  I also only managed to cut 16 rolls (8 per pan) rather than 24. But all in all they tasted amazing.  

Below are some photos of my Cinnamon Swirl baking experience.  I deviated from the recipe slightly but would not recommend this as you can see in my notes below the pictures.  For the full recipe please visit No. 2 pencil.


I used Betty Crocker Red Velvet Cake Mix


My Dough ready to set aside to rise.
 
  I put my dough in the oven with the light on to let it rise.  Punch it down after 1 hour and then let it rise again for another hour. 

 My dough after the second rise. 
 Now here I did something I shouldn't have.  Instead of spreading the butter and sprinkling the sugar and cinnamon mixture on top I melted the butter and sugar mixture and then spread it.  The result made my dough a bit soggy and hard to roll up. So next time I'll follow the instructions :)This may also be why I was only able to get 16 rolls instead of 24.

 My soggy cinnamon rolls ready to be put back in the oven to rise. 


 After rising for half an hour or so I baked them at 180C for 20 mins. 
Then smothered in Cream Cheese Icing.  I used 125g Cream Cheese and 250g Icing Sugar to make the icing.