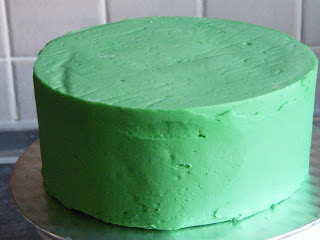
I first saw this technique demonstrated by Jessie Cakes a while back and have wanted to try it for a while. A recent post on one of my Facebook haunts brought it back to the forefront of my mind and I decided to give it a go for our family Easter Cake this year. I'm a complete novice but I was very happy with the results I achieved and am confident they will only get better with practise. So here is a realistic pic of what the average joe can expect to achieve using this fabulous techinique and frosting your cake UPSIDE DOWN :)
For starters to do this you'll need a spackling knife, a piece of card, some grease proof paper and a decorators turntable.
 Trace around the top of your pan onto the card and tape down a piece of grase proof paper making sure there are no creases.
 Add your Buttercream and spread until it is about 1/4in past the circle you traced.
Place in the fridge for about 15 minutes.
Once chilled, remove from fridge and position the top cake layer upside down on the buttercream circle.
Fill stack and crumb coat your cake and return to the fridge for 15 miuntes.
Remove from fridge and add the final coat of buttercream to the side of your cake. Be generous as you will remove the excess in the next step.
Forgive my photo, the spackling knife should be held at a 45degree angle not straight on. It was just hard for me to hold it correctly and snap the picture. I should say it also took a few spins for me to get the hang of the correct angle to hold it.
Using your clean spackling knife held at approx 45 degree angle place your hand all the way around the cake back to where the knife is touching the cake and spin the turntable all the way around without stopping. Make sure the spackling knife is touching the board as you do this. If you need to go over it again make sure the spackling knife is clean each time you go around.
When you are happy with it turn the cake over onto its board. Remove the cardboard from the top but do not remove the greaseproof paper. Return the cake to the fridge for 15 minutes.
Remove from the fridge and carefully peel away the grease proof paper and Voila!
First place the buttercream in some cling film.
Then roll up the ends of the cling film.
Insert the coupler and then insert the icing into your piping bag.
Pull the end of the cling film out.
And cut it off.
When your done simply remove the insert and throw it away and the inside of your bag will still be clean.


I have recently stumbled on your tutorials when I was trying to make some gum paste flowers. Ever since then, I will check your site for tips whenever I encounter any problems. I simply love your tutorials; you make everything looks so easy!
ReplyDeleteDoreen