

In this tutorial I'm going to show you my method for making a Gumpaste Stargazer Lily. Stargazers are a beautiful flower and a great focal piece for any floral arrangement. Stargazers are however one of a number flowers who are poisonous to people and therefore not safe to put on a cake. Being able to recreate this flower in sugar is a beautiful and rewarding alternative.
Materials needed to make a Stargazer Lily
PME Veined Lily Cutter LY1001
Large Stamens or make your own stamens using a Heart Plunger Cutter
28 guage wire (if making your own stamens)
24 guage wire
22 guage wire
Gumpaste / Flowerpaste
Gumpaste Modeling Tools
Small Rolling Pin
Edible Glue
A Cake Dummy or Piece of Foam to hold petals as you work
Foam Pad
A plastic sandwhich bag
Green Floral Tape
Burgundy Paste Food Colour
Blossom Tints / Dusting Powder
Decorating Brushes
Recommened items:
Non stick rolling out board
Flower storage board
Ok to get started you need to make your stamens. You can buy them already made up. I have a pack at the PME shop in Enfield for £5.71. But I found that you can also make them very easily if you have a small heart cutter handy. I've used the medium size heart cutter from my plunger cutter set and some 28 guage wire. Just cut out and fold your heart in half over the wire.
You need 6 stamens for your lily.


Set stamens aside. Next you are going to make the pistol. Cut a length of 22 guage wire length can vary depending on how long you want your lily but bear in mind this is going to be the stem you add the petals to.

Roll a small piece of green paste into a ball and thread onto your wire. Pinch the paste between your finger and thumb and using a rolling motion roll the paste up your wire (you may want to watch the video below to see how I do this).

The pistol needs to be about 3/4 the length of your flowers petals.

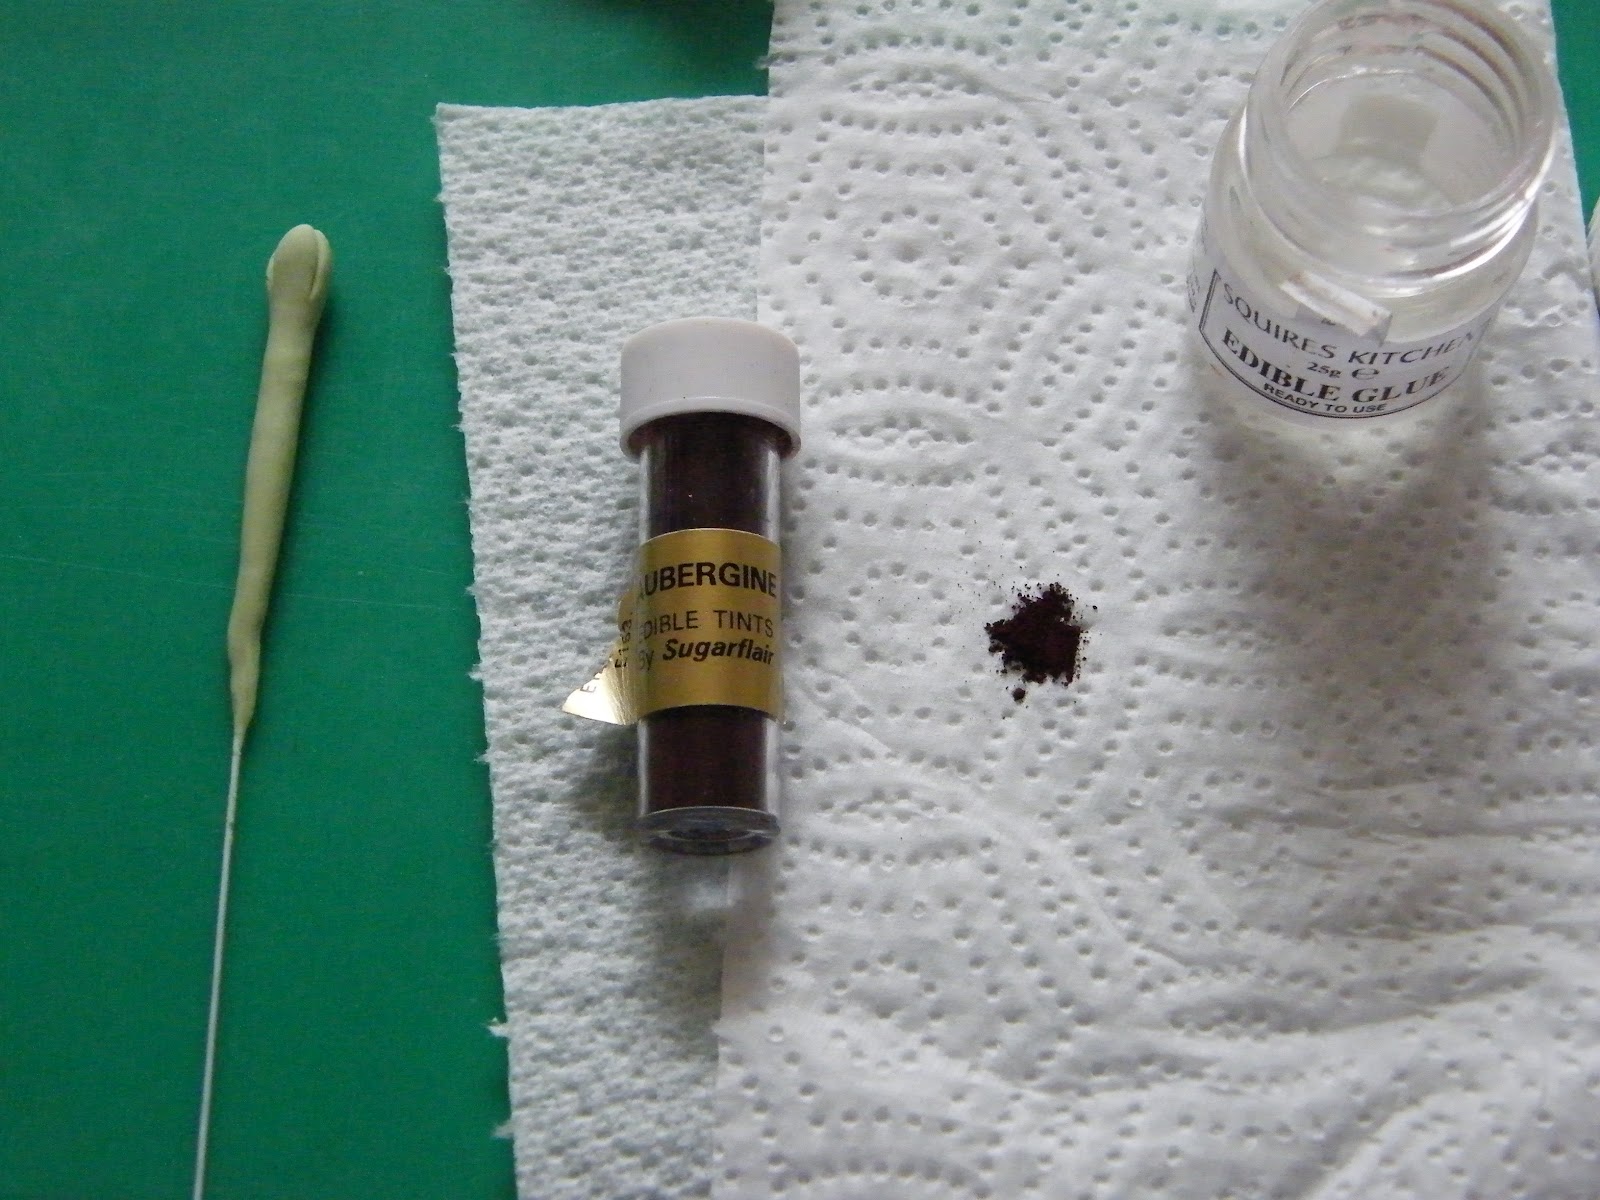
Slightly flatten the tip of your pistol and using a veining tool make 3 marks into the top of the pistol starting from the top and pulling down.


Dip the tip of your pistol into some edible glue and then into some dusting powder to make the pollen on the end of the pistol. Here I've used Aubergine Dusting powder but Lily colours can vary.


To make my petals I've added a very slight amount of Daffodil Yellow to my Paste to give my petals a very slight yellow tinge.


Using a smaller ball of paste but the same method as we did to make the pistol, thread onto a 24 gauage wire, then using a rolling motion roll the paste up the wire. They need to be about 3/4 the length of the petal. They should be about the thickness of a firework sparkler. I make mine all in one go and store in a flower storage board to save time, but if you don't have one of these boards you probably want to do the petals one at a time to prevent them drying out.


Cut out 3 of each petal shapes. Again I've done this all in one go and stored in my flower storage board to prevent drying out.

Soften the edges of the petal with your ball tool


Place your petal upside down on a plastic bag and place a wire lined up with the veining.

Fold over your sandwhich bag.

And using your fingers press the paste on the wire into the petal smoothing over until the paste is blended in and flat.


Carefully remove your petal. The sharp part of the wire sometimes pokes out the top. If this happens just carefully pinch the petal to hide it again.

Bend your petal into a Lily shape and set aside.

Repealt to make all 6 petals.

Now for the colouring. For the stamens I've used Terracotta and Green, but colours can vary. Have a look on the internet or a real flower for colouring inspirations.


Tape your stamens to the pistol you created earlier.


Then start taping your petals to your pistol. Make sure to assemble your flower while the petals are still soft as it is easy to bend them into the lily shape. Start with the wider petals in the front then the narrow petals at the back.

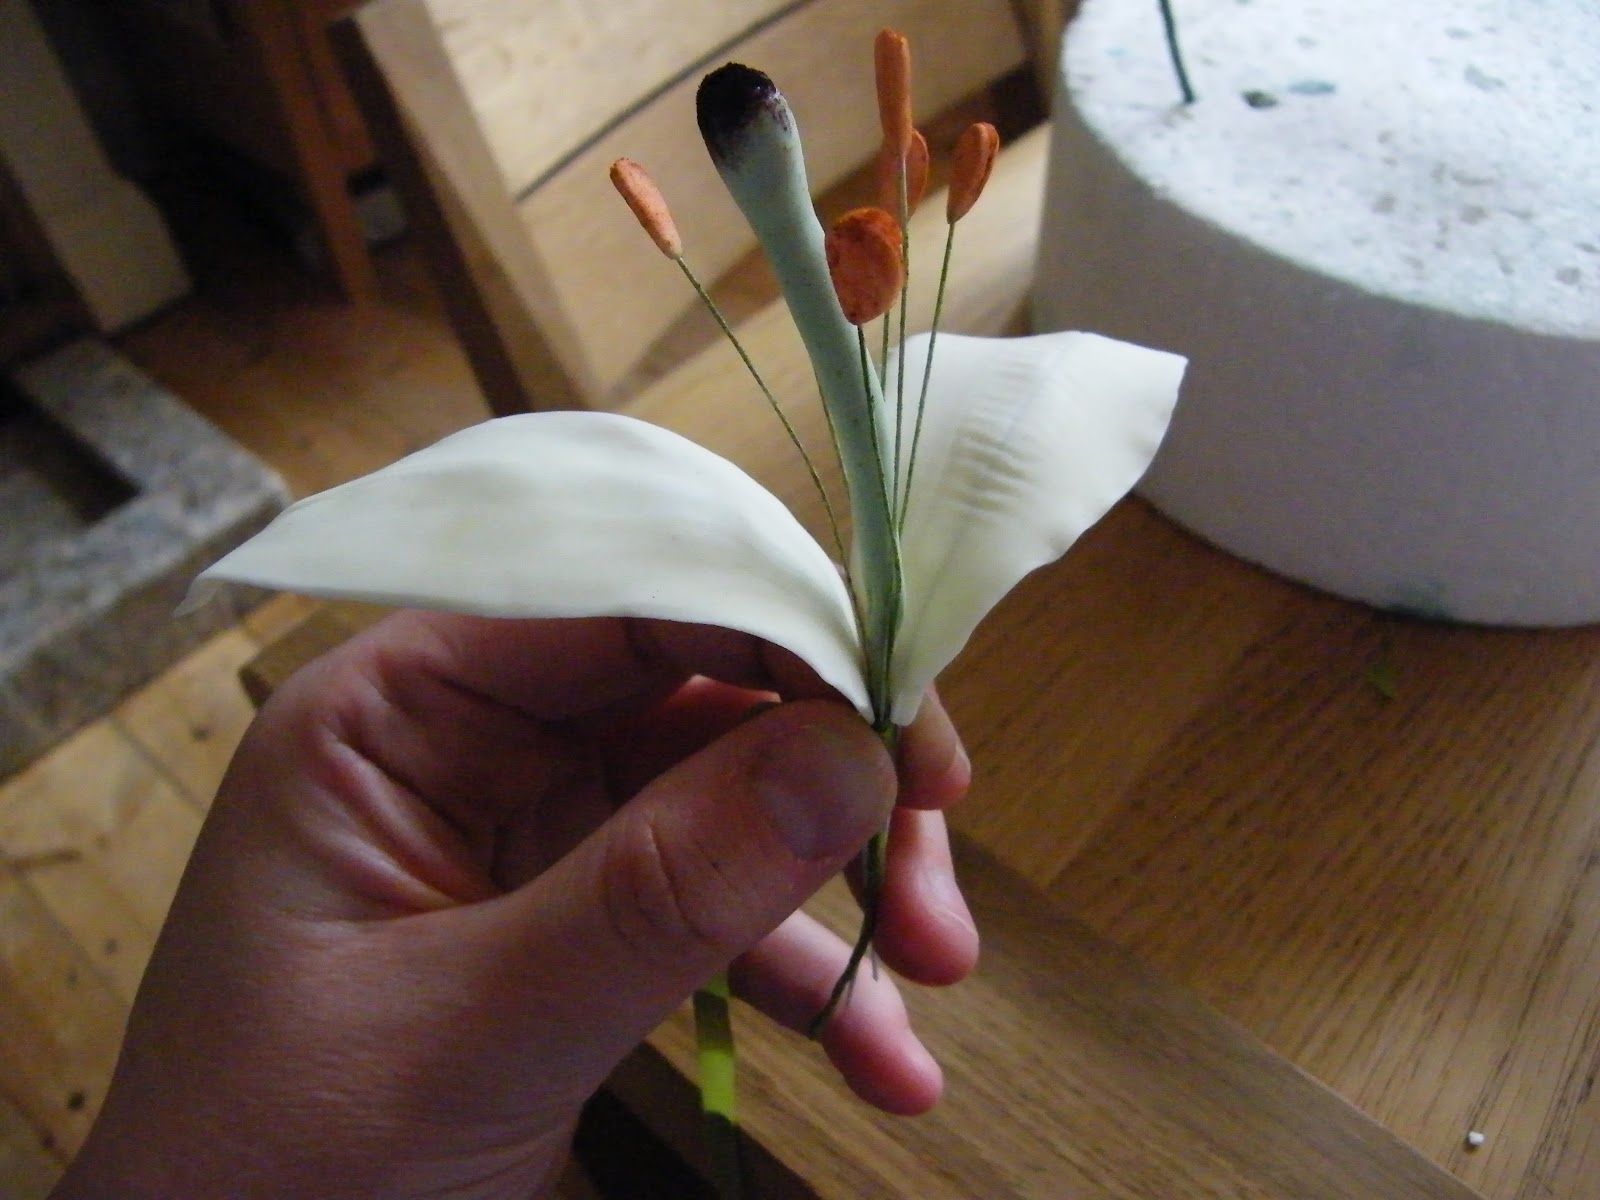


My flower all taped together.

To colour my flower I've usde primrose and spring green for the centre of the flower and on the back of the petals. Also a very little primrose on the tips of the petals. You might find it easier to dust your petals before you assemble the flower. Either way is OK.


For the spots on the Lily use paste food colour and a very fine brush. I've used Wilton Burgundy Paste. I recommend that you add the spots after the flower is assembled as it is too easy to smudge the paste while assembling the flower.


My finished Lily

A video demonstration of me making a Stargazer Lily.
And some photos of my work:
Getting creative and changing up a Stargazer Lily into a Rapunzel Magic Golden Flower from Disney's Tangled.

Sugar Flower Birthday Cake featuring a Stargazer Lily

very nice job.
ReplyDeleteThank you :)
Deletevery clear and precise in your instruction, cant wait to start making my own stargazer
Deletecool . . .i'm in kuwait and this is a great thing to do for my girlfriend when i get back
ReplyDeleteLovely tutorial, i love the idea you had for the stamens,genious:-))
ReplyDeleteJo
magnifique, un grand merci pour se Tutorial, super instructif.....
ReplyDeleteThis is an awesome tutorial! How do you suggest storing them once made? My stepsister wants some on her wedding cake on April 6th, but I have a cake to work on this week & Easter is the following weekend. I want to make them the first part of the week before Easter, but am stumped on any ideas for storing them for nearly two weeks.
ReplyDeleteHi Crystal, I use cake dummys (styro foam blocks) to store mine. Just like in the tutorial. They will keep for a long time. 2 weeks won't be a problem at all. I have some I made a year ago that, though I wouldn't use them on a cake, they look the same as the day they were made.
ReplyDeleteI absolutely LOVED your tutorial with your in depth instructions; however, I would have loved for you to talked me through your process while you performed each tasks. Thanks to your instructions, with practice, I'm positive I can create these flowers, but, if time is a deciding factor, are these available for purchase already made? Further, sans the tools you have listed above for this particular project, what other tools would you suggest are absolutely essential for a beginner of any edible flower-making projects? I'm a complete neophyte, so any suggestions you are willing to share will be greatly appreciated. Thanks.
ReplyDeleteThank you for your feedback :) The noise you don't hear in the background is my husband looking after my 2 & 3 old. I tried doing a video with audio and could never get through it without being interrupted which is why I went to this format. Funny when I made this a year ago I never imagined it would have reached so many people :) To answer your question I have and recommend the Wilton Gumpaste Tool set. If you click on the link in the video description it will take you to the product on Amazon if you would like to see which one I mean. It has everything tool wise you could possibly need and I have used all of them on various projects. The Mexican Foam pad is also an essential and a good quality set of artists brushes. I also find my flower storage boards extremely useful for saving time. I have seen some ready made flowers on sites such as Etsy, I have thought of doing this before but have not tried it as of yet. I'm sure I would need to test it before hand to see how to pack to ensure they survive the post as I am sure you can appreciate how fragile they are. I hope you get on well with your flowers and I am happy to help if you have any questions.
DeleteI love your tutoring is marvelous. I made one step by step and real look like the natural flower..Congratulation and Thanks for share /;0)
ReplyDeleteThis is great, will try thank you!:)
ReplyDeleteHi, you are just awesome,very clear and precise,thanks a lot
ReplyDeleteYour star gazer lily looks so real and not much fuss easy techniques,like always my precious mother says use the minimum tools and make the best outcome!Thanks once again ,please talk and upload a voice clip nice to hear my teacher talking to me!
Please post more especially orchids and many more.
Your lily of the valley video should win a prize for the most efficient and easy way ,still real looking,clearly THE BEST!
Congratulations you have become my best sugar flower tutor!
Thanks A Lot
Pritha,CA
Waw! Thank you very very much for the tutorial. I feel very fortunate of having found you!
ReplyDeleteKisses,
Ana
Nice post. I was checking continuously this weblog and I am inspired!
ReplyDeleteVery helpful info specifically the remaining phase :
) I deal with such information a lot. I used to be seeking this certain info for a long time.
Thank you and good luck.
Also visit my website: http://www.airsafehitches.com
a wonderful tutorial for this flower. the best i've seen..you have written each section beautifully and so easy to understand..l have never attempted one of these yet but will have a go now...l got a mould a couple of weeks ago from a company on the internet called..HAWTHORNE HILL MOULDS.. l ordered a mould from this supplier for something else l was doing and it turned out great. they do a whole set for a lilymould there with leaves stamens and petals from £8 to £12 depending on the size and style. dont know if anyone has used it before but thinking of ordering and trying it out..thank you once again for a fantastic demonstration.. so pleased l found you. i'm still going to make it from scratch like you have as well tho will let you know how l get on. . kind regards
ReplyDeletesylvia
kent
england.